
As far back as I can remember one of my favorite past times during the holiday season was laying under the Christmas tree gazing up through the branches , lights and ornaments. Christmas trees have been a celebratory statement for centuries. The tradition began in Germany and is now celebrated with an estimated 100 million Christmas trees around the world.
Since it’s origin was in a more northern climate the use of the Evergreen made perfect sense. For many years now I have been celebrating The holiday season in Beautiful Miami Beach. Even though almost everything in Miami Beach came from someplace else , because it’s mostly a man-made island, the idea of decorating a Evergreen in this tropical landscape has always felt forced and out of place. This year I decided to do something different. Utilizing Clusia, an indigenous foliage and creating a tree that was the shape of an evergreen but created from a much more common found foliage in my area. Though the process is more time-consuming than just going out and buying an evergreen, I have been quite pleased with the results. This year my tree blends with my environment and I was able to create it with some simple pruning of Clusia branches found on my property and a trip to the hardware and floral supply store . Please see my step-by-step process below and how to create a Christmas tree that can be made utilizing foliage from any area.
Step one:
Get a simple piece of fence post pine (4$ Home Depot) cut down to about 30 inches less than your desired tree height. Position it vertically in a tree stand.
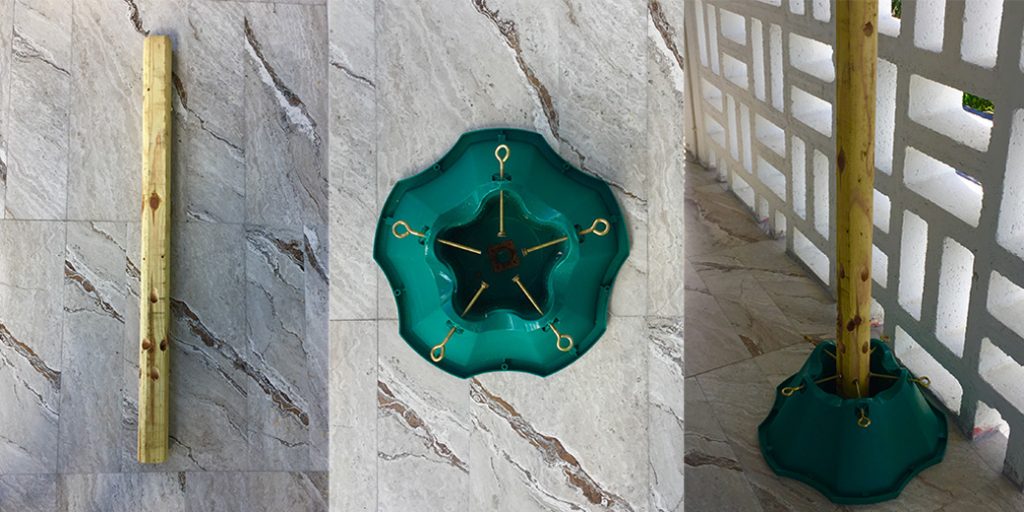
Step two:
Get approximately three dozen feeding tubes ranging from 1 inch to three-quarter inch (local floral supply) With an electric drill start about 12 to 18 inches up from the base using the 1 inch wood drill-bit and drill into pole at, 12 o’clock, 3 o’clock, 6 o’clock and 9 o’clock at about a 45° angle. Go up another 6 to 12 inches depending upon the density of your branch foliage and drill another four holes at 1:30, 4:30, 7:30 and 10:30 at about a 50 to 55° angle. Keep repeating these two processes increasing the angle 5 to 10° while reducing your feeding tube size as you work your way up the pole. At the top of the pole drill your center hole and two flanking either side of it. Now take your feeding tubes and slide them in the whole making sure they fit snugly. If they are loose just add some tape to tighten the gap. Now take a look at your foliage/branches and buy spray paint that coordinates with the color (Home Depot). For mine I chose to tint it silver so I bought a leaf green base and a metallic silver. Cover the area around the pole with a paper or plastic tarp and spray your base coat (green) then apply your accent or tint (silver).
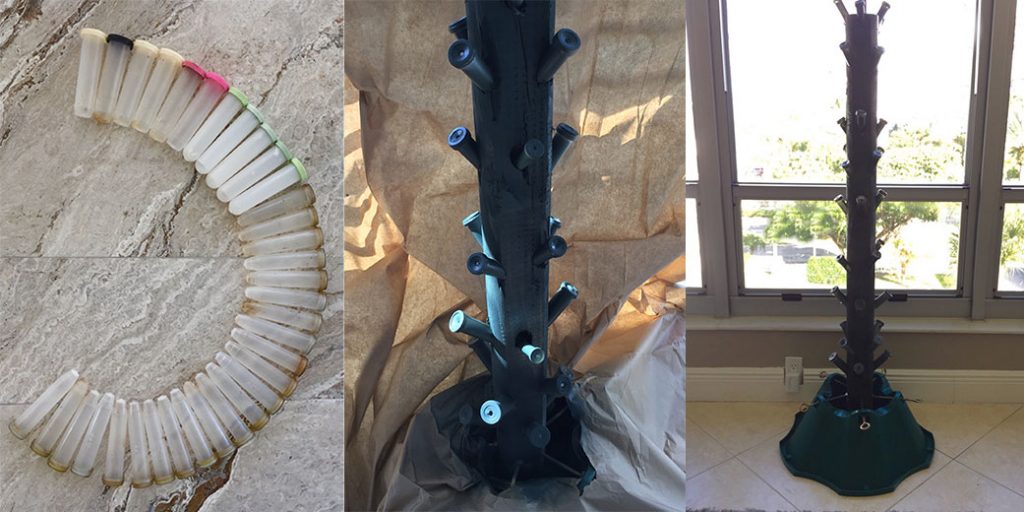
Step three:
Utilizing the same paper or plastic tarp used for spraying the pole lay, down a protective area approximately 6′ x 12′ .Now go through your foliage/branches and choose some of the larger and wider ones to start the base of your tree. Using a pruning shears, cut the four branches to fit the approximate desired base diameter and place them in the watering tubes. Once you are satisfied with your first four branches , remove the branches and add water to all of the watering tubes. Take a measurement of your branch from top to bottom and use this size decreasingly smaller branches as you work your way up the tree.
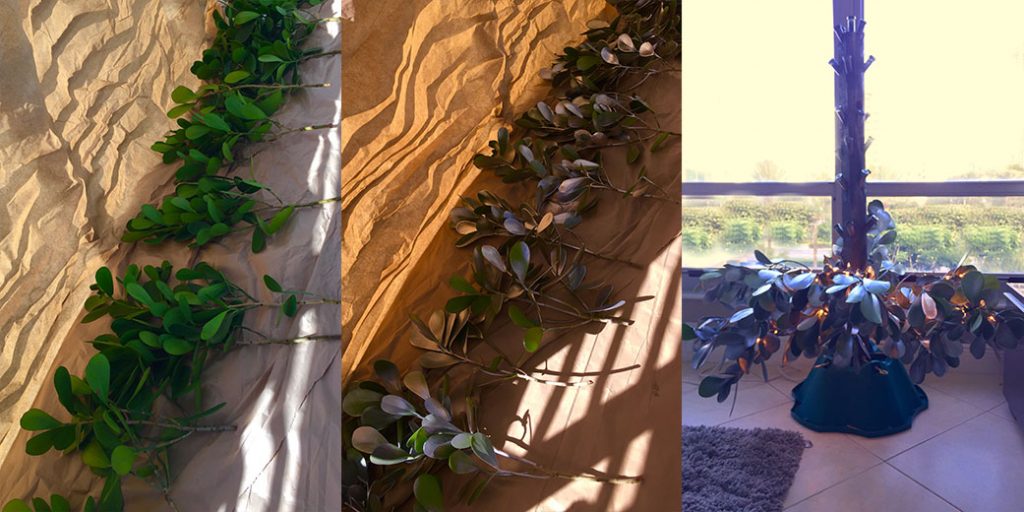
Now take the four base branches and gather another 8 to 12 branches of similar or slightly smaller size. If you desire a tint on your foliage like I did ,here is where you add the tint, laying all of the branches down on the tarp and spray painting them accordingly.
Allow the paint to dry and use the pruning shears to give a fresh-cut to the branch and place it in the watering holes. If you plan on using lights, I would suggest using the first four branches as a test to see how best to apply the lights. In some cases it will be better to apply the lights as you put the branches in. Now work your way from the base of the tree on up. As you install your tinted branches place out new branches to tint and let them dry. Keep in mind that you want to look for one large branch for your top piece. Once you have all the branches in place you now can begin to make adjustments. I suggest using a little floral wire (floral supply store) attaching the wire to the branch and back to the pole, moving the branches around accordingly to give the desired fullness and shape. For my tree I decided to add a little fresh Babies Breath (Floral supply store). I used half inch watering tubes and placed the babies breath throughout the tree to give an effect of snow and help fill up some of the open areas.
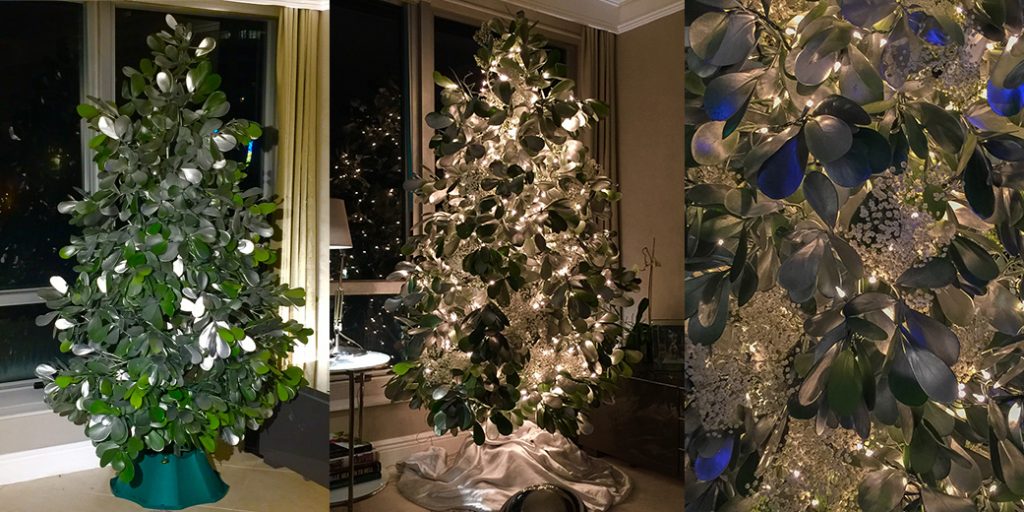
I hope this process has sparked interest and intrigue of others on how to solve ,what has been for me, a long standing issue of how to make a holiday tree blend with any environment. I am excited to see what others come up with. Please share them with me.
Love create and conjure magical memories together!
I wish you your family and your loved ones the happiest of holidays !